-
Written By Amit Chandel
-
Updated on September 13th, 2025
How to Move OST File to Another Drive? Quick Solution
User Query: “I want to transfer my Outlook OST file to another drive because my C: drive is running out of space. How can I safely transfer my OST files without losing my emails or any data?”
If your main drive is getting full, then your computer becomes slow and less responsive. Outlook creates OST files that grow very large and sometimes take up several gigabytes of space. A good way to fix this issue is to move OST file to another drive. This not only helps free up storage but also makes Outlook run more smoothly. In this blog, we will show you the step-by-step procedure to transfer the OST file safely using both manual methods and the professional MailConverterTools OST to PST Converter.
Why is it Important to Move OST File to Another Location?
Transferring the OST file to another location helps free up space on your primary drive and improves the overall performance of Outlook. It also keeps your data better organized and more secure. Let’s see more advantages:
- It creates extra free space on the drive for system operations.
- Outlook is more responsive even when dealing with large mailboxes.
- Reduces the risk of errors that come with oversized OST files.
- Helps you to store data on a drive with more capacity.
- Transferring OST files makes it simpler to organize and back up Outlook data.
- Also, it helps in maintaining long-term health and the speed of both Outlook and your PC.
|
Example: John works in an office where he uses Outlook every day. After a few months, his C: drive was almost full because the OST file had grown very large. His computer started running slowly, and Outlook froze. Instead of reinstalling Outlook or deleting other files, John moved the OST file to his D: drive. This gave him more free space on C: and made Outlook run smoothly again. |
Explore the Processes to Move OST File to Another Drive
There are free and expert ways to transfer your OST files to another drive. You can do it by changing the file location and registry settings, or use software for a quicker and safer transfer. Let’s study each way in detail:
Method 1: Move OST to Another Drive Using Registry Editor
This method changes the default OST storage location, allowing Outlook to create new OST files on the particular drive. Follow the steps:
- Firstly, close Outlook completely.
- After that, press Windows + R, type regedit, and press Enter.
- Then, navigate to:
|
HKEY_CURRENT_USER\Software\Microsoft\Office\<version>\Outlook |
Note: (Use 16.0 for Outlook 2016/2019/365, 15.0 for 2013, 14.0 for 2010) in place of version.
- To proceed, right-click Outlook > New > Expandable String Value.
- Meanwhile, name it ForceOSTPath.
- Later, double-click it and type the new OST folder path, e.g., D:\OST Files.
- Lastly, restart Outlook, and it will generate a new OST file in that location.
Method 2: Create a New Profile to Move OST File to Another Drive
This method lets you transfer the OST file by first setting a new path in the registry and then creating a new Outlook profile. Steps can be defined as:
- Initially, close Outlook.
- Afterward, open Registry Editor (regedit).
- Then, go to:
|
HKEY_CURRENT_USER\Software\Microsoft\Office\<version>\Outlook |
Note: (Use 16.0 for Outlook 2016/2019/365, 15.0 for 2013, 14.0 for 2010) in place of version.
- To proceed, create or edit ForceOSTPath and set it to your new folder (e.g., E:\OutlookData).
- Further, open Control Panel > Mail > Show Profiles.
- Meanwhile, select Add and set up your email account.
- Later, Outlook will create a new OST file in the folder you set.
- Finally, set this new profile as the Default and restart Outlook.
Method 3: Change OST File to Another Drive Using Symbolic Link
This method works and is reliable if you want to keep your existing OST file but transfer it to another drive without creating a new Outlook profile. Procedure can be followed as:
- At first, close Outlook.
- Afterward, navigate to the default OST folder:
|
C:\Users\<YourUsername>\AppData\Local\Microsoft\Outlook\ |
- Then, cut and paste the OST file to your new drive, e.g., D:\OSTData\Outlook.ost.
- To proceed, open Command Prompt as Administrator.
- Meanwhile, run this command (replace username and path):
|
mklink “C:\Users\<YourUsername>\AppData\Local\Microsoft\Outlook\Outlook.ost” “D:\OSTData\Outlook.ost” |
- Later, press Enter.
- Lastly, restart Outlook, and it will now use the OST file stored on the new drive.
Limitations of Free Move OST File to Another Drive
- Manual processes are not easy because you need to change system settings that most people do not know.
- If you make one wrong step, then Outlook stops working properly.
- Some steps can only be performed if you have admin access on your computer.
- If your OST file is already damaged, then transferring it would not fix the problem.
- Manual ways take a lot of time if you have more than one account.
Automated Solution to Move OST File to Another Drive
Using manual methods to transfer an OST file can be a difficult task. These methods involve editing the registry, long syncing times, and the risk of errors. A smarter option is to use a professional tool that makes the process simple and safe. The OST to PST Converter Software helps you easily convert your OST file and save it to any drive you want. It checks for no data loss, keeps everything intact, and gives you a smooth transfer experience.
Steps to move Outlook OST data files to another drive:
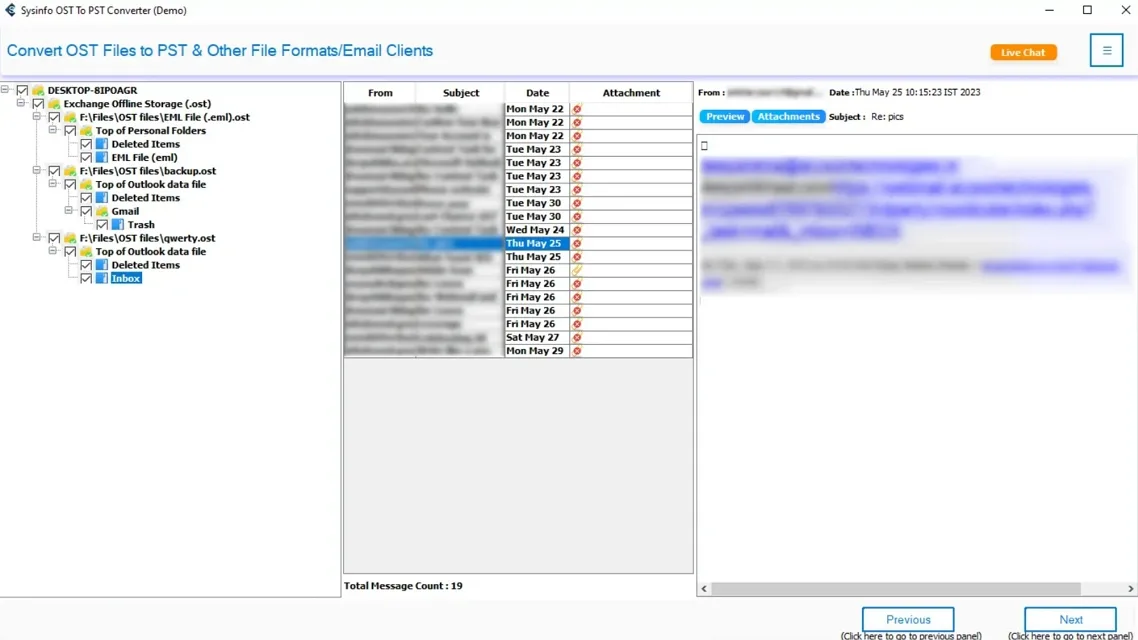
- At first, launch the OST to PST Converter Tool and browse to add OST files.
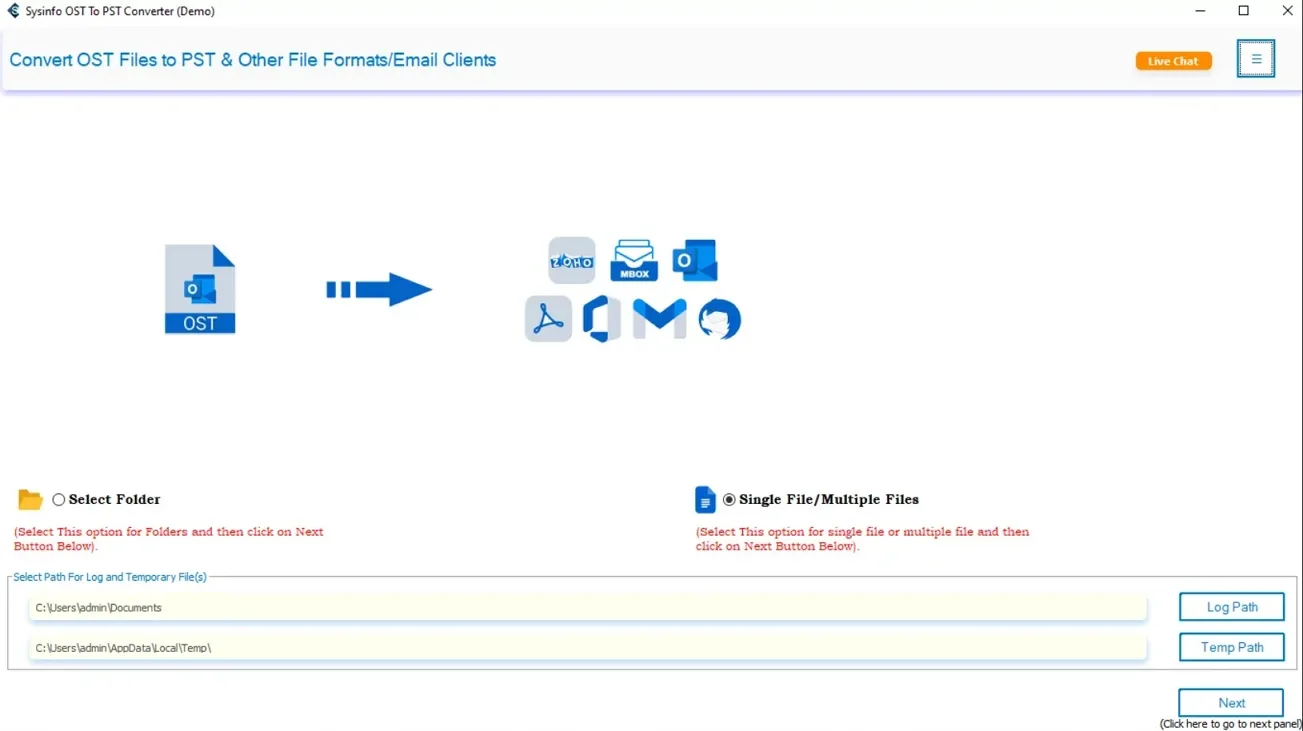
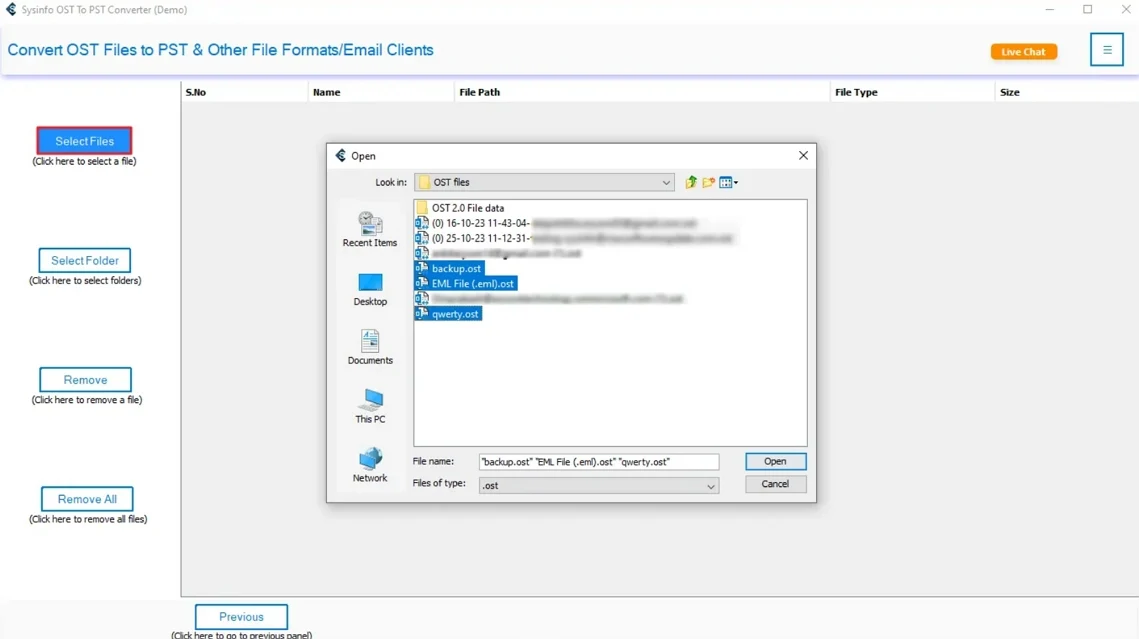
- Afterward, select and upload the OST files you want to transfer.
- Meanwhile, preview the content (emails, contacts, calendar, etc.) and press Next.
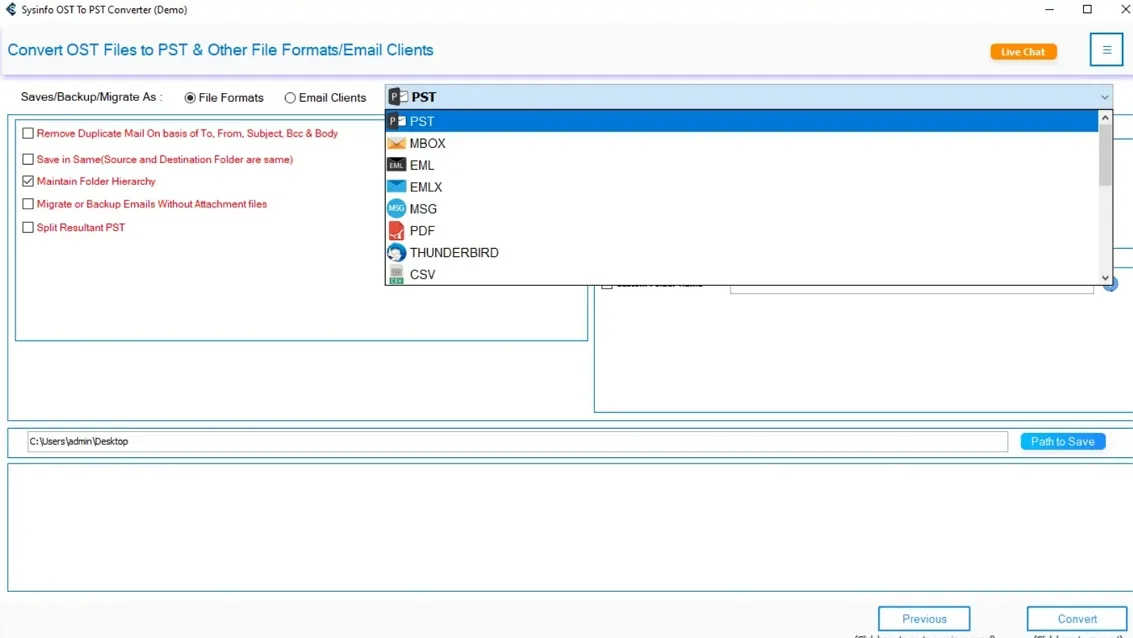
- Further, from the saving options, choose the PST format.
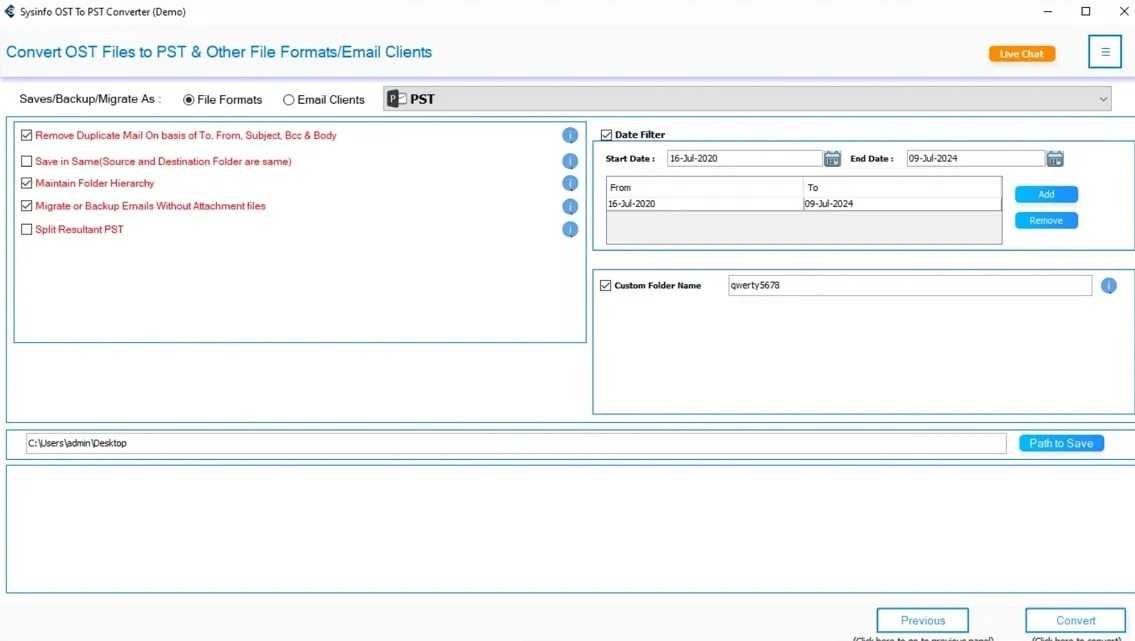
- Later, set the destination and apply additional features.
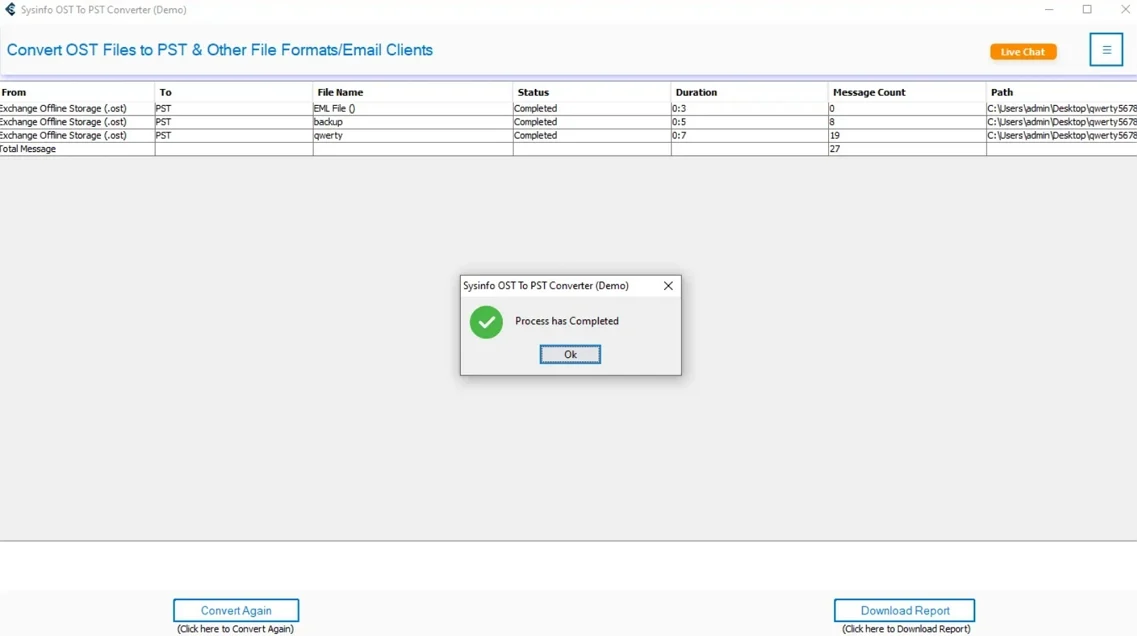
- At the end, select Convert to start the process.
Conclusion
Move OST file to another drive is useful when you change drives, upgrade your system, or simply want a safe backup of Outlook data. Manual methods can help, but they involve complicated steps, a higher chance of mistakes, and take more time to sync. Using a professional Converter Tool is a good option. It makes the process quick, safe, and keeps all your emails, contacts, and attachments secure.
Frequently Asked Questions
Q. Which is the best tool to move OST file to another drive?
Ans- The best option is to use a professional MailConverterTools OST to PST Converter. It safely transfers your OST file to another drive without losing emails, contacts, or attachments.
Q. How do I change OST file to another drive?
Ans- You can move it manually by editing the Registry, creating a new Outlook profile, or using a symbolic link. But if you want an easier and safer method, using a professional tool is recommended.
About The Author:
Meet Amit, an experienced SEO expert and content planner. He uses his creativity and strategy to create content that grabs attention and helps brands reach their goals. With solid skills in digital marketing and content planning, Amit helps businesses succeed online.
Related Post