-
Written By Amit Chandel
-
Updated on August 27th, 2025
Best Solution to Migrate Emails from Namecheap to Office 365
User Query: “I use Namecheap for emails, but now I want to transfer all my messages and data into Office 365. What is the best way to transfer Namecheap emails to Office 365 without losing any data?”
Many businesses and individuals start with Namecheap email service, but after some time, they transfer to Microsoft Office 365. Because it provides better productivity, advanced security, and seamless collaboration tools. The main difficulty comes when you need to transfer your existing emails, contacts, and calendar. In this blog, we will explain both manual methods and a professional solution using the MailConverterTools IMAP Migration Tool to migrate emails from Namecheap to Office 365. You will learn step-by-step instructions and the most reliable way to complete the process.
Migrate Namecheap Email to Office 365 – Why It’s Required?
Users move from Namecheap email to Office 365 because Microsoft provides more advanced features, higher security, and better collaboration tools. Here you get more facts:
- Office 365 provides high security that protects against phishing, spam, and data breaches.
- In Office 365, you will get more storage compared to Namecheap’s limited plans.
- Office 365 allows easy collaboration with apps like Teams, OneDrive, and SharePoint.
- You can easily access from anywhere with Outlook on desktop, mobile, and web.
- Businesses can scale easily by adding or removing accounts without any difficulty.
Explore Ways to Migrate Emails From Namecheap to Office 365
There are two main approaches to transferring your emails from Namecheap to Office 365.
- Manual Methods: Free, but are time-consuming and limited.
- Automated Tool: Fast, secure, and supports bulk import.
Let’s explore each one in detail:
Native Methods to Transfer Namecheap Email to O365
You can transfer your Namecheap emails to Office 365 manually by using the IMAP migration option in the Office 365 Admin Center. The second is by adding both accounts to Outlook and then transferring emails between them. Let’s see each free method:
Method 1: Namecheap Email to Office 365 Migration via IMAP
This is the official Microsoft method to export emails from Namecheap to Office 365. Follow the steps:
- Firstly, log in to Office 365 Admin Center > open Exchange Admin Center.
- After that, go to Recipients > Migration > select + > choose Migrate to Exchange Online.
- To proceed, select IMAP Migration.
- Meanwhile, enter Namecheap IMAP details:
|
- Further, add Namecheap email credentials.
- Now, map each mailbox to the right Office 365 account.
- Later, start the migration batch and monitor progress.
- Lastly, update MX records in Namecheap DNS to point to Office 365.
Method 2: Migrate Emails from Namecheap to Office 365 Using Outlook
This method is simple and suitable for users who have only a small number of mailboxes to migrate. Steps can be defined as:
- Initially, start Microsoft Outlook on your computer.
- Afterward, go to File > Add Account and add your Namecheap email using IMAP.
- Incoming server: mail.privateemail.com (Port 993, SSL/TLS)
- Outgoing server: mail.privateemail.com (Port 465 or 587, SSL/TLS)
- Now, again, go to File > Add Account and add your Office 365 account.
- Meanwhile, both mailboxes will now appear in Outlook’s left panel.
- Further, simply drag and drop emails or folders from the Namecheap mailbox to the Office 365 mailbox.
- Finally, wait for Outlook to sync everything with Office 365.
Method 3: Migrate Namecheap Email to Office 365 via PST file
This method is useful if you want to backup your Namecheap emails first and then import them into Office 365 in bulk. Steps can be followed as:
- Firstly, add your Namecheap account to Outlook.
- Further, go to File > Open & Export > Import/Export.
- To proceed, select Export to a File > choose Outlook Data File (.pst).
- Meanwhile, save the Namecheap mailbox as a PST on your computer.
- Now, add your Office 365 account to Outlook.
- After that, again, go to File > Open & Export > Import/Export.
- Later, choose Import from another program or file > select the saved .pst file.
- At last, import it into your Office 365 mailbox and let Outlook sync.
Downsides of the Manual Methods
- These methods require technical knowledge to set up IMAP migration and configure accounts.
- Drag-and-drop or PST import methods can lead to duplicate emails in Office 365.
- These processes are time-consuming if you have large mailboxes.
- Manual methods only transfer emails, while contacts, calendars, and other items are not transferred.
- Manual methods do not provide advanced features like filters, batch processing, or real-time monitoring.
Expert Solution to Migrate Emails from Namecheap to Office 365
Manual methods can transfer emails, but they are slow, complex, and not reliable for large or multiple mailboxes. This is why many users choose a professional IMAP Mail Backup Tool. This tool directly connects Namecheap accounts with Office 365 and makes the transfer faster, safer, and more accurate. It also reduces the risk of data loss or duplication and provides a smooth migration with minimal effort.
Now, follow the steps to transfer Namecheap Email to O365 by using the software:
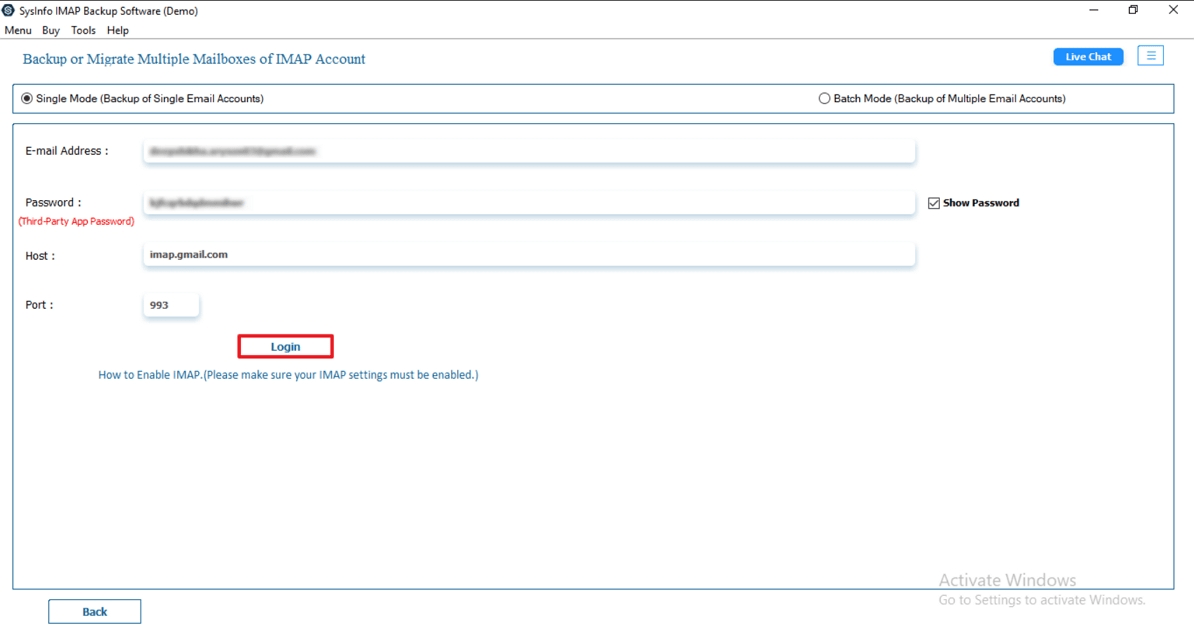
- At first, download and install the IMAP Backup Tool on your system.
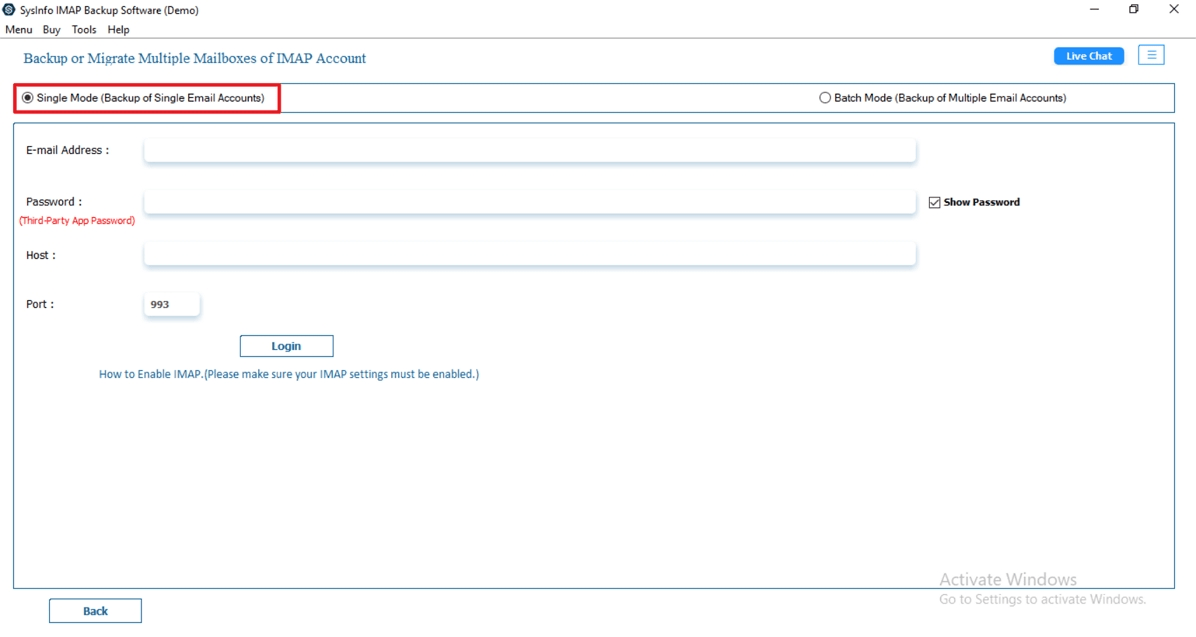
- After that, start the tool and log in with your Namecheap Email ID and password.
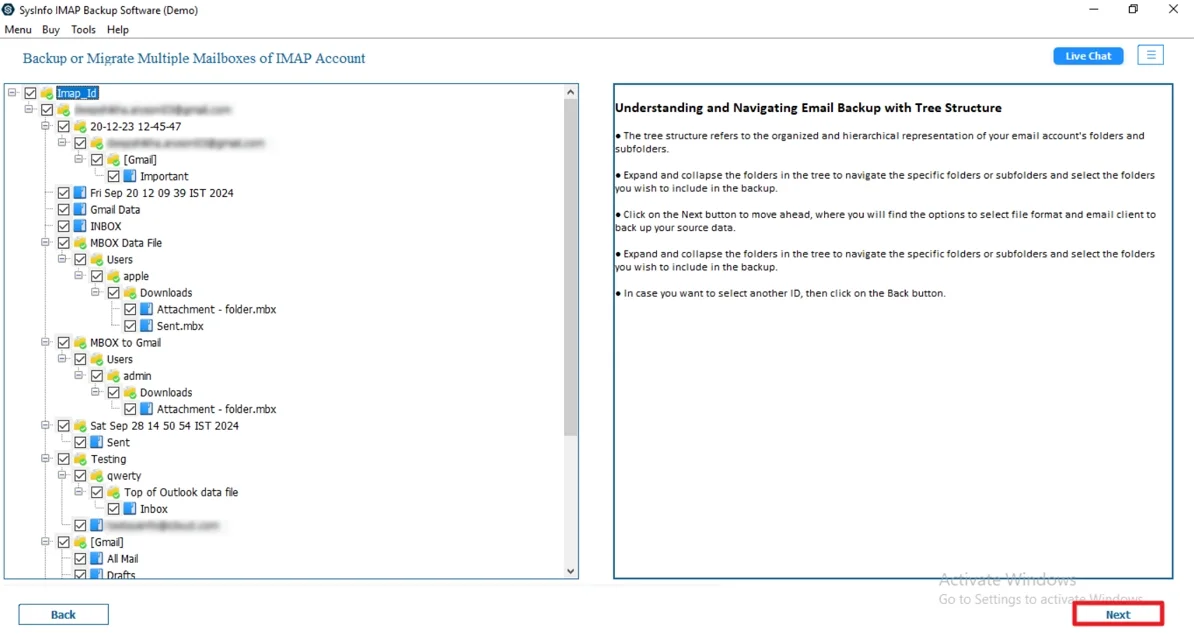
- To proceed, select the email folders you want to migrate, preview them, and select Next.
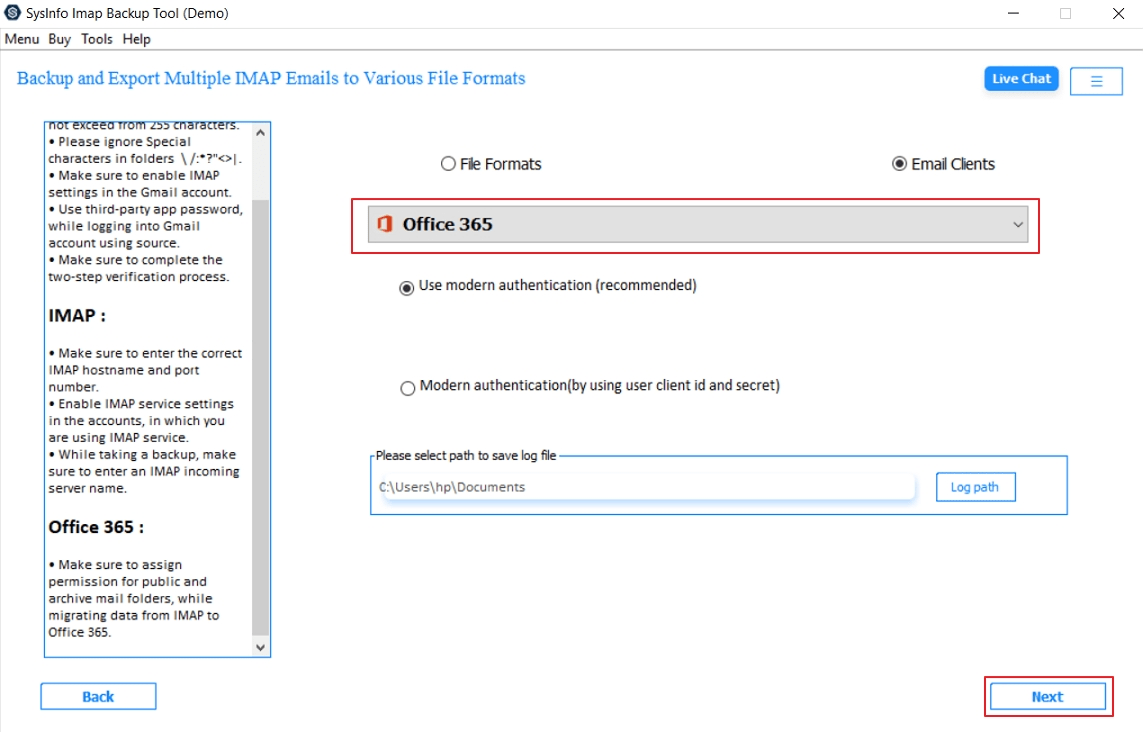
- Meanwhile, from the list of options, choose Office 365 as the destination email client.
- Further, enter your Office 365 account credentials to connect.
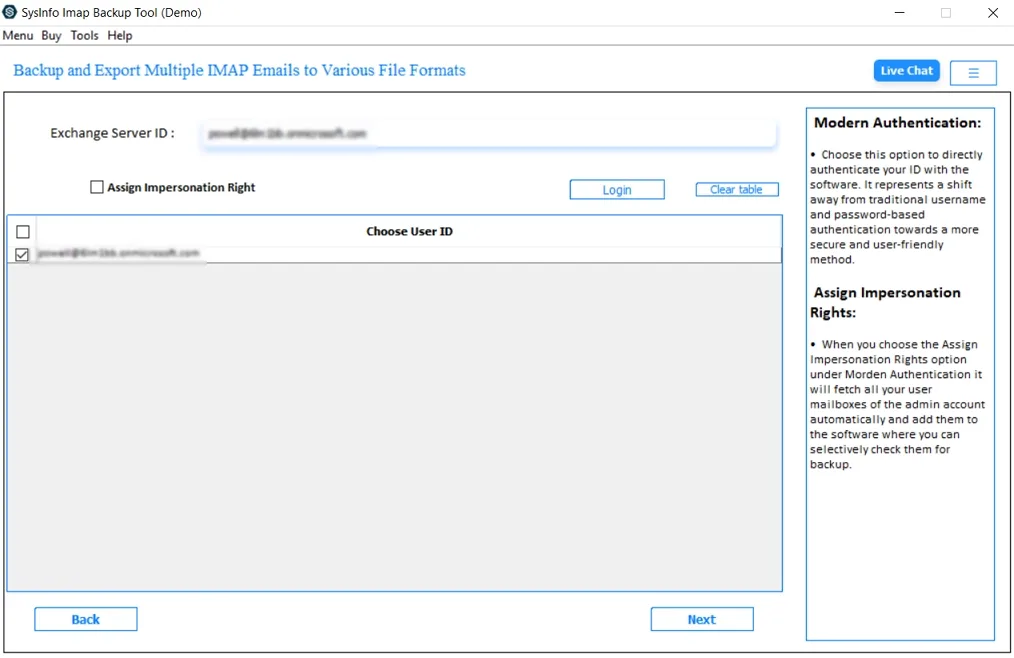
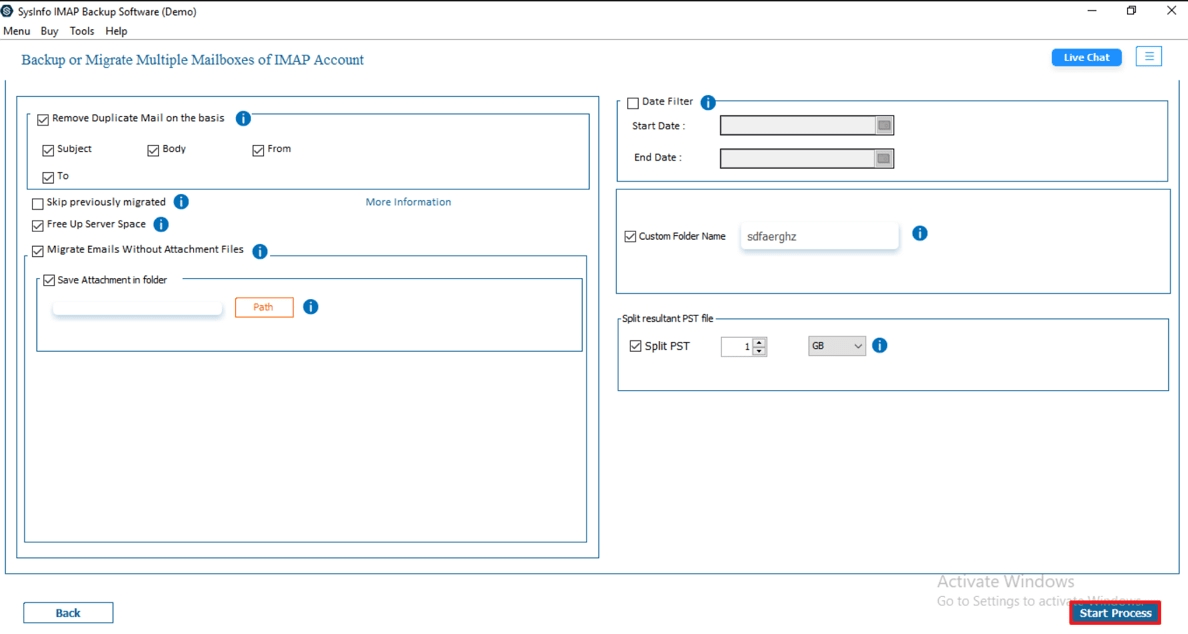
- At last, apply additional features and select Start Process to begin the process.
|
Real-World Example: A small IT company using Namecheap email for its 25 employees. As the team grows, they transfer to Office 365 for better collaboration with Teams and SharePoint. The IT admin uses manual IMAP migration, but it takes too long, and some folders don’t sync properly. To avoid this, they use a professional IMAP migration tool and successfully transfer all accounts easily, without losing a single email. |
Conclusion
Migrate Emails from Namecheap to Office 365 is an important step for users who want advanced security, better collaboration tools, and reliable cloud storage. Manual methods like IMAP migration, Outlook drag-and-drop, and PST import are available, but they are slow, complex, and not for multiple mailboxes. To make the process easier and risk-free, using a professional tool is the correct option. It is fast, secure, and done accurate transfer without data loss. That’s why users prefer to use the tool over any manual method.
Frequently Asked Questions
Q. Is it possible to migrate Namecheap emails to Office 365 manually?
Ans- Yes, you can migrate Namecheap emails manually using methods like IMAP migration in the Office 365 Admin Center, Outlook drag-and-drop, or exporting and importing via PST files. However, these methods are slow, complex, and not suitable for small mailboxes.
Q. What is the best way to migrate emails from Namecheap to Office 365 without downtime?
Ans- The most reliable way is to use a professional MCT IMAP Backup Software. It allows multiple transfers, maintains folder structure, and checks for no data loss or duplication. Since the migration happens in the background, users can continue working without downtime.
About The Author:
Meet Amit, an experienced SEO expert and content planner. He uses his creativity and strategy to create content that grabs attention and helps brands reach their goals. With solid skills in digital marketing and content planning, Amit helps businesses succeed online.
Related Post