-
Written By Amit Chandel
-
Updated on January 19th, 2026
How to Convert CDR to PSD? Complete Guide
CDR files (CorelDRAW) are native to the vector graphic suite of CorelDRAW, commonly used in signage, logos, print documents, etc. But as collaborative workflows become more multi-platform, especially between CorelDRAW and Adobe Photoshop, the need to convert CDR to PSD increases. However, without compatibility, designers and print professionals must adapt accurate techniques like the MailConverterTools CDR Converter Tool discussed in this blog.
What Motivates to Convert CDR File to PSD?
While CorelDRAW is a powerful tool for vector layouts, Adobe Photoshop is essential for raster editing, web banners, brochures, and detailed image work. Some unique reasons to perform CDR to PSD conversion are:
- Graphic teams working in different software suites often require cross-platform access for files: Photoshop-Team Collaboration
- Photoshop excels in adding enhancements like text effects, filters, mockups, and more after the finalization of the vector layout.
- Some printers and marketing organizations, and platforms support only the PSD format for template standardization.
- Also, conversion to PSD provides better image structure and layers as compared to other image formats.
- Moreover, PSD files aren’t limited to a specific design application and are very flexible and scalable.
How Do I Convert CDR to PSD?
There are two absolute techniques to perform CDR file to PSD conversion: a manual (free) and a professional (tool). We will discuss both of them, but before that, make sure you have this prerequisite: Installed CorelDRAW and Adobe Photoshop applications. Furthermore, having vector technical knowledge and time is beneficial, especially if using the manual way.
Hands-On to Convert CDR to Photoshop
For an effective and smooth free conversion, follow the steps mentioned below:
- Open the CorelDRAW application and go to File → Open.
- Then, browse and load the .cdr file into it that you wish to change.
- Further, separate the elements into layers for post-editing Photoshop controls. (optional)
- Move to File again and click on Save As → PDF. After that, its setting dialog opens.
- Ensure you enable the Preserve layer and CMYK profile options in settings.
- Afterward, start Adobe Photoshop and drag the CDR (now PDF) file into it.
- Later, choose CMYK color space and resolution around 300 DPI.
- Click OK and browse to File → Save As → and pick PSD to convert CDR to PSD.
Shortcomings of the Manual Method
- When you import to PDF, the layer groups are flattened.
- Transparency effects are not identical to CorelDRAW after conversion.
- Text is possibly rasterized if not changed to outlines before the export.
- It is not possible to batch convert large CDR files manually.
- The possibilities of data loss are high if you are unable to use CorelDRAW.
Pro Tips to Convert CorelDRAW File to Photoshop
- Convert fonts to outlines before export to avoid substitution issues.
- Use the Print to PDF feature after you enable the layer settings. It is in case Save As PDF fails to preserve the structure.
- Verify the Image DPI before you import it to Photoshop to prevent quality degradation.
- Keep the vector shapes separate before the final export, as Photoshop rasters merged shapes.
Despite all these, if you are worried or hesitant about manually converting CDR image to PSD. Then, go through our expert-tested and verified automated tool explained here.
Professional Converter to Convert CDR to PSD
If you are a designer managing 100s of CDR files at once, especially in enterprise print, then use our CDR File Converter Tool. It is faster, safer, and more reliable to convert bulk CDRs to PSD and many more formats in minimal time. This versatile tool has advanced features, such as:
- Helps open CDR files without CorelDRAW.
- Streamlines no loss convert CDR to Photoshop.
- Allows removing incorrectly added CDR files.
- Supports all CorelDRAW and Windows/Mac versions.
- Preserves the format, layout, text layers, objects, etc.
Ideal For: “PrePress, Ad Agencies, Designers, and everyone else.”
| Use Case:“A design studio was struggling to handle around 100+ CorelDRAW templates daily. Using our CDR to PSD Converter, they were able to reduce the manual conversion time by 70% while ensuring layers and resolution accuracy.” |
How Convert CDR File to PSD?- Its steps are:
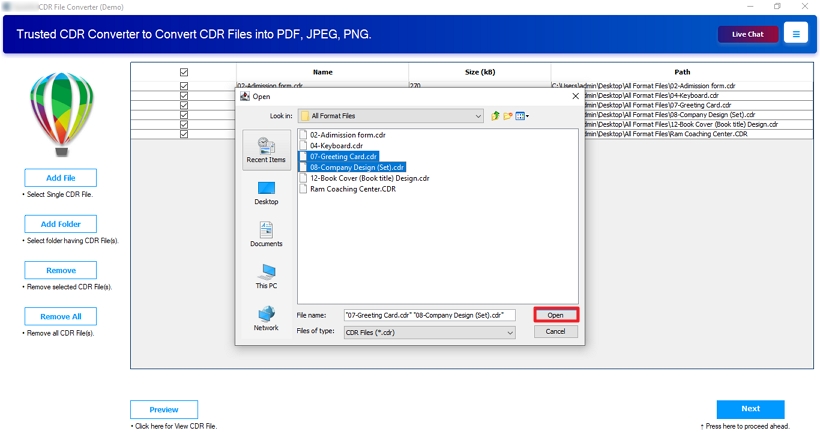
- First, download, install, and launch our CDR to PSD Conversion Tool.
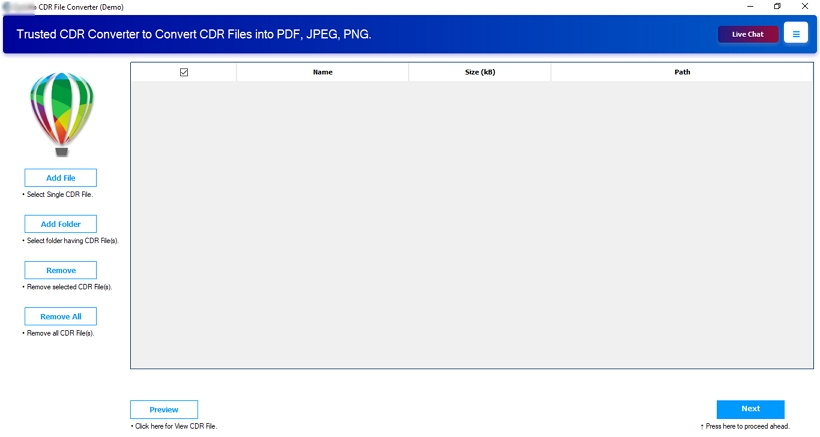
- Then, click Add File and select the CDR files to convert. Hit Open → Next.
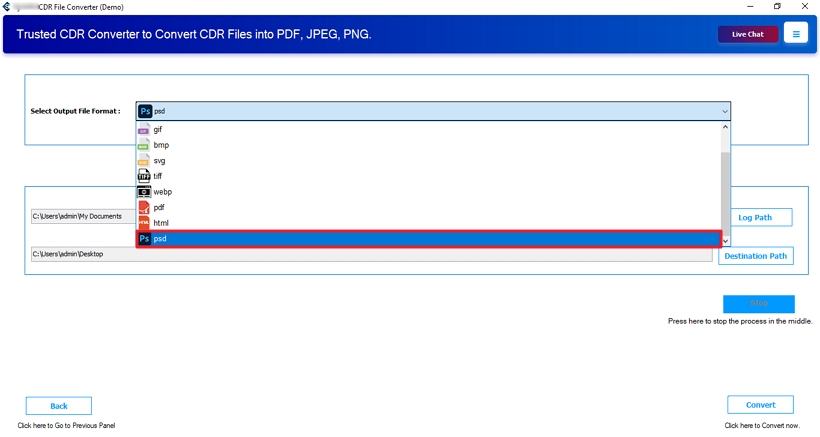
- Further, select the output file type “PSD” from the drop-down list.
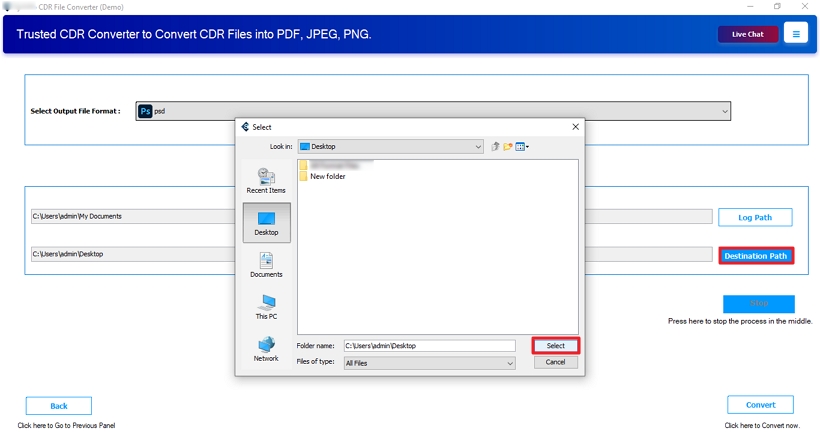
- Press Destination Path to choose your desired folder location and tap Select.
- At last, click Convert to finally save the CDR files as Photoshop PSD.
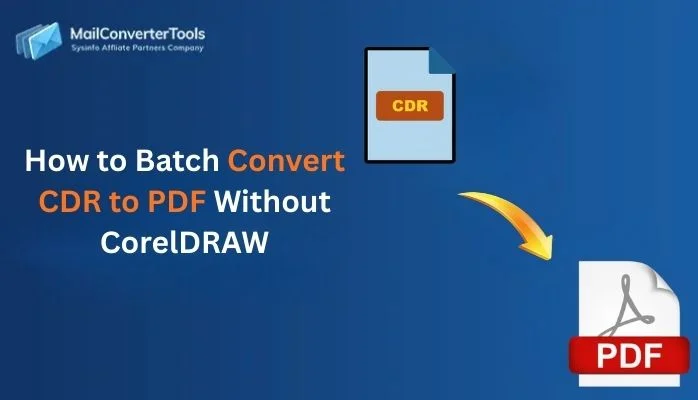
Explore More: Convert CDR to PDF
Conclusion
Converting CorelDRAW (.cdr) files to Photoshop (.psd) format is a creative step for design ecosystems. While the manual export is quite useful for single files, the professional tool is best to batch convert CDR to PSD. Furthermore, for a fast, scalable, and effective solution for your print design solutions, schedule a consultation with our experts. Or, use the demo version of the software.
Frequently Asked Questions
Q 1. How do I convert CorelDRAW file to Photoshop for free?
Ans: For free conversions from CDR to PSD, download the demo version of the CDR File Conversion Tool. It exports while preserving the layers and is best for bulk conversions with no security concerns.
Q 2. Can I convert CDR to PSD without installing CorelDRAW?
Ans: Yes, of course, you can. The self-sufficient CDR Image Converter for Windows and Mac performs this task only with the CDR files on your local system. You do not need to specifically install the CorelDRAW application or connect with Adobe Photoshop.
About The Author:
Meet Amit, an experienced SEO expert and content planner. He uses his creativity and strategy to create content that grabs attention and helps brands reach their goals. With solid skills in digital marketing and content planning, Amit helps businesses succeed online.
Related Post